

Microsoft Windows 10 is a dynamic operating system that is vastly improved over other versions. It is equally usable on a laptop, tablet, or conventional desktop, with the dependability of older versions of the operating system coupled with forward-looking advancements. If you are looking to download Windows 10 and save big on your purchase, turn to the software experts at SoftwareKeep for the lowest prices, free-shipping, and the best customer service and support before, during, and after the sale.
Microsoft’s latest software offering comes with many sought-after improvements and you have several different options when it comes to installing the software if you have purchased the upgrade. If you are looking to perform a clean install on a new machine without a current OS or if something goes wrong with your initial installation, we have provided the following instructions to do so through a bootable disc (otherwise known as a boot drive).
The first item you will need is a USB flash drive, and you will want to create bootable USB media from ISO for Windows 10, and will have to set your computer’s settings to boot from a USB device.
Installation 1: From ISO or USB
Step 1.
Open the Media Creation Tool from the USB device and click “Run.”
Step 2.
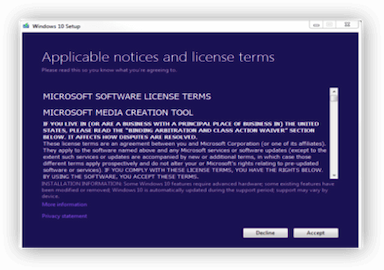
Click on the “Accept” button on the lower right-hand corner to accept the license terms. (This must be done to install the software, per the developer).
Step 3.
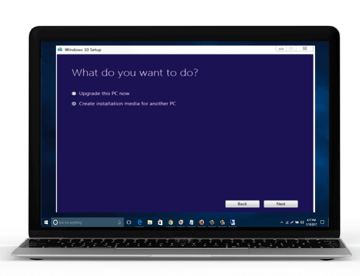
You will be presented with two clickable options. Select the option “Create installation media for another PC,” and click on the “Next” button.
Step 4.
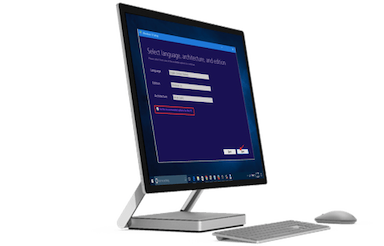
You again have two options to choose from. You can either select your language, software edition (Windows 10, in this case) and either 32 or 64-bit. It is recommended that you try 64-bit first if you aren’t sure which option you should select.
You can also simply check the box “Use the recommended options for this PC” and let the tool automatically configure it for you.
Step 5.
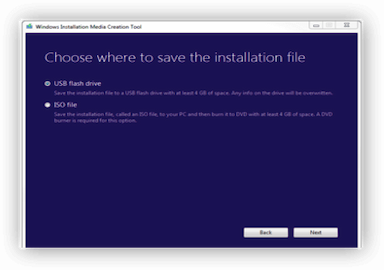
Select USB Flash Drive or ISO File.
- If you select USB: Wait until the file is downloaded and insert your USB device into your computer. It is important to note that this will wipe all of the existing data on your USB device, so make sure that any information that you want to keep is stored elsewhere!
- If you selected ISO: Wait for the file to download and insert a disc when prompted by the application.
Changing BIOS to Boot from USB / CD-DVD Media Boot File
In order to start from bootable media that you have created, you might need to change your Basic Input/Output System or BIOS. Here are the steps to do so:
Step 1.
To enter your computer’s BIOS, you must first start your computer. When you are prompted, press Del, Esc, F2, F10, or F9 to enter the system’s BIOS. Usually, you will find the key to enter the BIOS on the screen.
Step 2.
Find and select the Boot Options menu.
Step 3.
Select the correct Boot Media device that you are using (USB, CD/DVD ROM drive) as the first boot device on your computer, and save the setting changes.
Step 4.
Turn your computer off.
Step 5.
Insert the USB or CD/DVD boot media.
Step 6.
Start your computer again to this time boot from the drive you selected.
Installation 2: Installing Windows 10 from Bootable Media
Step 1.
Insert the drive (USB or CD/DVD) Windows Installation Setup boot media
Step 2.
To start the setup process, you must turn on your computer.
Step 3.
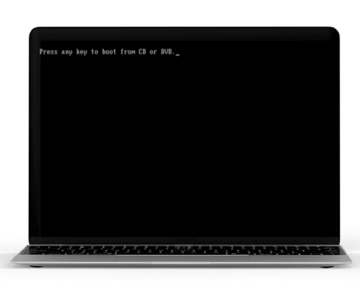
A message prompting you to press a key to boot from the device should appear. Press a key to force your computer to use Windows Installation Setup boot media upon starting.
Step 4.

Windows Setup will load and you will see the Setup window on your screen. You will be given your Windows Setup Options and will be able to Select Your Regional Settings. This will configure your preferred language, time, currency format, and keyboard type.
Step 5.

Click the button to “Install Now”.
Step 6.

You will be prompted to enter your Windows Product Key:
- If you ordered your software online, this key will typically be on your online order form or in your confirmation email after purchase.
- If you purchased a physical copy, the product key will be included in the packaging.
Once you have located and entered the key, click Next.
Step 7.
Accept the License Terms. It is recommended that you read the terms of the software license before agreeing to them. You can select the box stating “I accept the license terms” and can then click Next.
Step 8.
Select Custom Installation.
Step 9.

Choose which hard drive and partition you would like to install Windows on. You can also choose to Delete All Partitions so that Windows Install will install the OS on the hard drive that you have selected.
Warning: if you delete all partitions, all of the data on the hard drive (software, applications, and files) will be destroyed, so make sure to back everything up that you want to keep!
Install Windows on your chosen hard drive or partition. Click the Next button and the installation should begin.
Step 10.
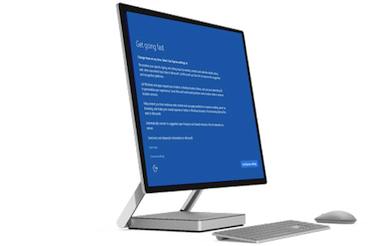
You will be prompted to personalize your settings, including preferred browser, connectivity, error reporting, and security. You can choose to customize these settings yourself, or can click Use Express Settings to customize.
Step 11.
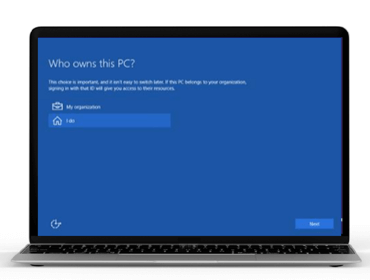
Identify who owns the device. You will be asked “Who Owns this PC?” and you can sign in with your personal or company ID (which will let you access the company’s resources, if using Windows 10 for work).
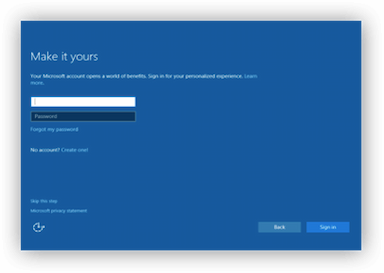
Step 12.

Use your Microsoft account to log into Windows 10. This will allow you to take advantage of Microsoft’s suite of applications (which they highly recommend) including Skype, Office, Outlook.com, OneDrive, or Xbox.
Once installation has been completed, you can remove the Windows Install media and can click Finish/Restart to restart your computer and run your new Windows 10 Operating System!
Why Choose SoftwareKeep for your Windows 10 Software?
If you are looking to purchase the software you need a a price you can afford, look no further than SoftwareKeep. In addition to our highly-competitive prices, we offer exceptional customer service to ensure that you are satisfied with your purchase and are able to install and run the software that you purchased. We are here for you every step of the way, from sales to installation to support!
To find out more about the products we sell and how we can help you, visit our website at SoftwareKeep today or contact us to find out more.